Thursday, September 13, 2012

The Lillian Chair

I've been so busy lately getting projects done, and helping my b/f get ready for his first year of college.  Believe me, the last was a total pain.  Will is not from Ohio so there was a lot of drama involved in actually getting him into a school...a full year of drama my friends.  However not that his first day has come and gone I have found even more time for projects.

In all the chaos though I have neglected this blog and that makes me sad.  I have lots of projects saved up however.  Eventually they'll all make their debut here lol.

This is project I did for a neighbors little girl.  Her name is Eva and she is 2yrs old.  She is a wild child, but as sweet as can be.  The chair was something I found at our local Goodwill Outlet for I believe it was a $1. 

 Please ignore the chaos and clutter in the picture.  This is where all my "needs to do" are stored.  As you can see someone tried their own hand at decorating the chair in it's past life.  I did enjoy the name Lillian however so the chair was so named.  Eva's mommy does not like the color pink, but prefers bright colors.  Pretty much anything is better than pink, or so she told me lol.  So I got to work, and man what a pain such a little chair was.  I thought for sure this would be a quick project, and admittedly it was made harder due to my "user error".  Instead of priming or spray painting I decided my paint choice was dark enough to cover this light pink.  Boy was that a mistake.  First I used a paint color my b/f has been begging me to use called Sonic Bloom.  This is made by Dutch Boy, instead of buying a gallon I decided to buy a quart of their try and buy to see if we liked it.  I can say that we do enjoy the color however the paint was horrible.  It was super watery, I don't know if their other paints are this thin, but after using it on this chair I would never buy a gallon.  I decided to thicken it up and turn it into my homemade chalk paint.  Again paint was so watery that it took twice as much to thicken.  After a good 72hrs of work here was my end result.


 No more pink.  It took approx. 5 coats of paint to cover the pink and the sanding...don't get me started on the sanding.  I should have spray painted the white on first, instead I was silly and hand painted it instead.  We were pleased with the end results, however my opinion didn't matter it was Eva and her mommy's opinion.  Eva clapped when I gifted her the chair and instantly sat in it.  My after pictures were taken 2wks after since Eva loved it so much I couldn't grab my camera fast enough and off to her house it went. 


I've been told that since receiving the chair she refuses to sit in her highchair and always wants to sit at her little table w/her chair to eat her meals.  I'm so glad she enjoys it.

Project cost:
Chair: $1
Paint: $6.95 (sonic bloom, though it was bought prior to this project)
Paint: free, already had on hand (Arctic White)
blood, sweat and tears lol


Monday, May 21, 2012

After but Not Before

Long time no post.  I know I say that a lot, however I'm horrible at taking photos of my projects and don't even get me started on taking before or during shots *shakes head*.  I'm a horrible blogger I know.  I have finished quite a few projects and sold a few on Ebay.  I recently finished a cute little table for my sister.  Well okay not FOR her, she saw it when it was finished and wanted it.  Normally I would not just give it away however it's rare for her to like anything I refurb so I felt that need to be nice.  That's what big sisters do right?

Here are a few pieces I redid and sold on Ebay.  Again I apologize for no before shots.

This is a set of sewing drawers I got a Goodwill for $3  I had seen an almost exact set used in a wedding shoot and decided I liked the distressed white so much that I had to mimic the look.

This is an old Homco (Home interior) mirror from the 70's I got from Goodwill for .49 cents.  It was a gaudy gold and I decided on a nice beachy blue.  Added a bit of ebony stain and I think she turned out perfect.  I let this one hang in our kitchen a bit before selling her.

This was a set of Homco (home interior) candle sticks I found at Goodwill for $1.99  Again gaudy gold, that got painted over with antique white and distressed.  I loved how these turned out.


This shelf from Home Interior we've had since I was a teenager.  I noticed on Ebay a lot of people were using them as knock off bed crowns.  I decided to jump on that wagon.  I first spray painted her white then mixed up my handy DIY chalk paint and hand painted over the spray paint.  Give her a bit of a distressing and she turned out great.


After all that selling I needed a trip to the local Goodwill Outlet.  I found this adorable little drop leaf table.  I suspect it once was one of those tables with the lamp through it, seeing as there was a medium sized hole that needed to be filled.  I believe someone's doggie also used the table as a teething ring since there were quite a few bite marks on the edge.  Used some wood filler and a sander and you couldn't tell there was any problems.  After that I got out the good ole DIY chalk paint and got started.  I used the antique white (for some reason I find this distressed best).  After I was done I felt like something was missing so I went to The Graphic Fairy site and found a nice tree to transfer on top.  Now this was my first time and it was a bit of a pain.  First I tried it with wax paper, that did not go well so then I tried THIS trick.  To say the least it will take some perfecting but I did like the vintage, aged look I got so I left it alone.


She was on her way to her new home when I realized I needed to take her picture.  You really can't tell how nicely she distressed.  She was and oak color underneath.


The tree is a bit faded and did not turn out perfectly but I still liked the end result.  I didn't want it looking brand new on a table that was suppose to be shabby and distressed.


I promise I'll update soon.  I have a gorgeous Paris Chic box I made out of an old cigar box I wish to share.  For now I must get back to the projects at hand.  Our local historic district (where I live) is having a neighborhood garage/yard sale on June 2nd and I plan on getting rid of some old junk along with some of my refurb stuff.

Saturday, March 17, 2012

Jars on Sticks

So I like everyone else on the internet am totally in love with Apothecary jars.  Though I refuse to pay the price that most stores are asking.  With that being said I have found one or two jars in thrift stores and made sure to quickly snatch them up.  I've noticed on the web many DIY'ers making their own jars with candle stick holders and vases.  I found a small candy dish (or so I believe it's a candy dish.  It was used as one by my grandma when I was a kid) at a local GW.  At first I was going to do nothing to it, but then when I put it with my other glass vases & doo dads it just seemed to short.

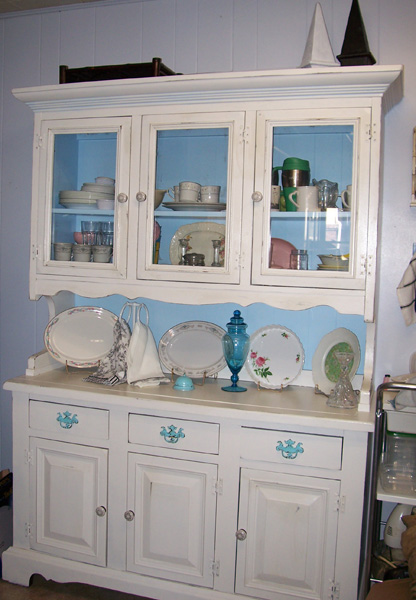
Soo I epoxied it to a glass candle stick.  I also bought a dollar store vase & glued it to a matching candle stick.  However it will later be turned into a faux mercury glass vase.  For now tho they are sitting pretty on top of my newly redone hutch (pictures of that coming up soon).  So instead of one project being finished last week I completed two.  No the glass wasn't a big thing but it did get the breakables off the stand and in a place of honor.

There are no before pics or even during since it's pretty easy to do.

Here they are alone


All I used was a Styrofoam plate, epoxy that I got from Hobby Lobby for like $4, and a plastic knife.  Squirted the epoxy and onto the plate, mixed as directed then placed a bit of glue on each piece.  Found the center of the dish & vase then placed the candle stick on.  I then took a very old and very heavy german-english dictionary and weighed down the stick on the vase.  On the candy dish I used a big can of Greens.  Yes yes very expensive weights I know.  Let them set for about 20mins then put them up for 24hrs to make sure they were good and glued (plus I have cats, I'm not so stupid as to leave them in anywhere they could get them).

Here they are with some of the other glass doo dads.
I don't think they all show up too well.  I need to rethink how they are arranged.  though I must keep in mind the vase in the back if not both vases in back will become faux mercury glass soon.

Now I'm off to paint a jar or mirror or something like that.

Enjoy your weekend,
Sarah

Thursday, March 15, 2012

Project Pile Up

"Project Pile Up" is quite the understatement.  Our entrance/downstairs looks like a junk room.  It's really the only free spot we have in the apartment for me to store items I want to work on.  It originally was suppose to be my craft room however my stuff piled up before an actual "room" was established.  Add to that fact that in the winter it is severely cold downstairs.  There are no heating vents so it's the equivalent of many of your garages.  So cold & piled high room does not make for good decorating.  So we came up with the plan for me to complete 1 project a week, that way we can slowly get the downstairs organized.  Oh did I fail to mention that since the downstairs was to cold I had been doing all projects in our newly redone kitchen?  Yeah, it's true.  So when you see my pictures don't hate on them too bad.  The kitchen is a little cluttered, but for now it works.

Moving on to one of this weeks projects,  the end table.  I found this little end table at one of our many local Goodwills.  She was only $4.99 and I couldn't resist her pretty little urn shaped bottom.  Now mind you there were 2 end tables there that day but I could only afford one and she is the one I chose (sidenote: I went back a few days later & the other table was still there so in the back of my mini SUV she went).  She was in pretty decent shape minus some scuffs and things on the top.  So I got to work by sanding her down a bit then priming the top (I only primed her because I had left over primer from the hutch I was painting.  That's a post for another day tho.)  I did forget, like usual to take a before I primed picture.  oops.

Behind the table on a little white chair you see a peek of a project in progress, not to mention an ugly wicker shelf that was there while the living room was being rearranged lol.

So once the primer had dried for ohhhh a week I got started on mixing my fake chalk paint.  A week is a good amount of time for primer to dry.  See I was making sure that it was really, really dry.  Okay that and I was finishing a hutch up.

So I painted the base first:
with some paint I bought for .69 cents from a local rehabitate place.  It's Sherwin Williams Blue Bell.  Took two coats and it went on like a dream.

Then it was time for the top:
The top was not exactly a dream.  It was painted with Color place Ebony Stone Black (in other words very black lol).  Now in this color only have I ever noticed the difference between cheaper paint and higher end-ish stuff.  This paint is almost like water even with baking soda mixed in.  The blue was nice & thick.  I don't know if black is just one of those colors or what.  We used it for 3 or 4 projects now and with each one we had to add more coats of the black than the lighter color.  Anyways back to this project.  Once it was all dry I sanded the roughness out somewhat and then polyed just the top. 

I thought I was done but then I remember the other little table I had previously painted and decided she needed a 2nd make over to match the newer table.  I do not have a before she was painted picture but to say that she was a mess is an understatement.  Got her for $4 at a St. Vincent thrift store.  It was in a very scratched up veneer.


Originally when I painted it it was the same blue all over, however when I polyed the top it turned yellow.  I'm not sure if I'm doing something wrong or what, but I've noticed all my poly turning yellow on lighter colors.  I made sure to buy the clear gloss, but seems to not matter.  I don't know if I should try something different to protect or if I'm just doing it all wrong.

Anyways those are the two tables.  I am very pleased but my b/f does not like the combo.  He thinks the darker color should be on the bottom.  However that didn't work with the poly.

Those are my 2 projects for Monday and Tuesday.  Wed. Project will be posted tomorrow. 

I hope you enjoyed my two little tables and please come see me again,
Sarah

Saturday, December 31, 2011

2012 Calender

Free Printable Calender for Owl Lovers or anyone, because this is C U T E!


Owl Lover 2012 Calendar

I've already downloaded mine ♥

Saturday, December 17, 2011

Pastel Christmas

All three trees are finally up & decorated.  I have begun the wrapping and nearly finished it.

Favorite wrapping paper this year goes to this love paper.  White paper with velour black snow flakes.  Super cute and super cheap.  Found this roll of loveliness at the Goodwill Outlet brand new.

Little gold pow & doilies name tag

from left to right: Parchment paper from Dollar Tree, Blue paper w/white pine cones are Jaclyn Smith & Silver w/red snow flakes are Trim-a-Tree both from Kmart.

Parchment paper turned out really good. Can't believe I found paper already decorated for a $1.

I'm horrible at taking pictures of Christmas trees, please forgive the craptastic photo. Lavender tree has purple & gold bows though I believe next year they will be replaced with balls.  Blue tree has teal/aqua and silver balls and the pink tree is silver bows & balls.  This is Pinkys last year, she will be for sell if anyone is interested.

Lights off.  Oooh, they really are prettier in person. The blue is my favorite.  The bow tree toppers are all Jaclyn Smith.
Let me state for the record getting a decent picture of these babies hasn't been easy.  I have a few cats in the house, 2 of which are kittens.  Christmas has been a delight for them to say the least.  Oh oh and before I forget the drapes are new.  Found them at Goodwill for 6.99 a pair.  They are a JcPenny brand in a pretty damask cream.  Nice and heavy, perfect change for two reasons...Need heavier drapes for the cold (these keep drafts to a minimum) and it's basically a nice change from the floral Laura Ashley drapes we've have for Spring & Summer.

Sunday, December 4, 2011

Out With the Old Pt 2

Tonight I will be sharing one of my new favorite pieces.  An old school desk, we did like it just the way it was however I thought it's color was a bit over stated considering the kitchens new paint.  Speaking of the kitchen I do have a very small part to share. This is sort of a before & after (I'll have to take a few more afters).
Paneling Hell:
We rent & it's far to expensive to get rid of this hideous paneling so we decided to paint it.  The doorway is a door to our landlords storage area, which we do not have access too.  If you've seen my hutch redo then you can see this wall is pretty well covered.
Now that I have that out of the way here is the school desk before in it's overstated appearance:

Here she is in all her bright pink glory,  not horrible but in definite need of a cleaning.  Again just a bit to over stated for the new wall color.
Here she is now:


Nice lighter, softer color to go with the new kitchen wall color dontcha think?  I made this blue by combining our living rooms wall color with antique white.  Also put baking powder in the paint so it would not be glossy.  Sanded it down nice & smooth.  I really in love with this piece now.  Please ignore the sewing drawers and kittah in the pic.  I was in the process of taking pictures for Ebay.

I'm not sure if I'm finished with her.  I feel like a stencil might be in it's future, only time will tell. Oh yes and there are plans for the hideous counter top.  ewww!

Thursday, December 1, 2011

Busy, Busy Bee

Things have been a bit hectic with Thanksgiving and now Christmas right around the corner.  Not to mention all the projects I've undertaken as of late, leaves me little time to update let alone get on the PC.

I thought I'd share a couple projects I've finished recently.  I still need to take a decent picture of my finished desk but I just can't seem to get the right angle or the perfect lighting lol.  Anyways first up is this lovely jewelry "dresser" I redid:

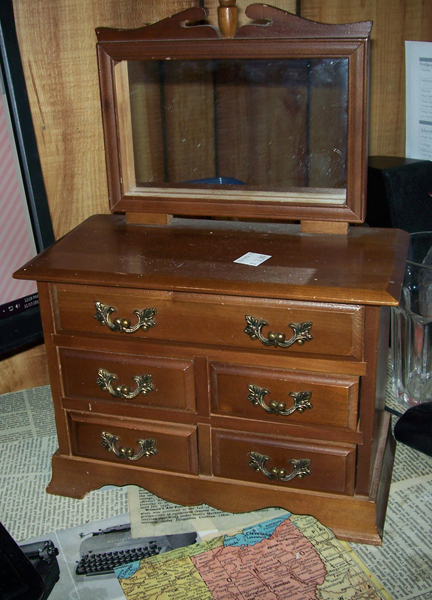
This is how she looked before.  Very pretty but a bit dark for my taste. Found at the local Goodwill Outlet.


Here she is now:


excuse the last 2 craptacular pics.  However you can see the top of my desk (probably going to get a recover).  This was my first experiment with a DIY chalk paint (I used the baking powder idea). I distressed her only a little, I'm not a huge fan of overly distressed pieces.  The inside looks brand new, I don't know if this was ever used.  Oh she is a music box as well, so she plays a pretty little tune to go with her pretty new look.  Currently this little princess is up for sell on Ebay.

Next is this cute little lap desk/music stand/podium.  I'm not really sure what it originally was. When I bought it, it was a hideous green and had mom burned into it.

I kind of forgot to take a picture before I added the wood filler to cover the Mom.  However I did remember in time to show the pea green color.  Oh ignore all the other crap around, that's where I store all the furniture to be redone.  That's my desk in the sanding phase.
Here is the desk/podium now.


I had found this lovely "oops" paint at walmart for $5, it's a minty color & I think it looks great.  I don't understand how this is an oops.  Anyway I added a Fleur-De-Lis stencil over where the Mom was filled in.  I did not distress it because...well I didn't think it needed it.  This would be a great gift for a student or for a teacher as a lap desk. Also could be used a table top music stand or podium ?  She is currently for sale on Ebay as well.

Last little thing is a set of metal/brass rose wall scones.  I've had these for quite awhile, I couldn't decide what to do with them.  Finally I gave in and painted them pink.  See I feel like I use too much pink, but I can't help it not only do I like pink but I feel like others do as well.
Found at a local Goodwill, I couldn't resist the roses, they are so pretty.

Lightly distressed so you can see the brass a bit.  I think they turned out great (if you are a pink person).  They are currently up for sale on Ebay (though I admit it will be hard to see them go).

That is all the projects for now, I'll update on a few more tomorrow, plus I'll share the school desk I redid that I am completely in love with.

Monday, November 14, 2011

oops

So my pictures did not turn out the way I wanted them, as in I have a horrible time setting up a picture to show the item in a presentable manner.  I want it to look lovely not like "yup there is a pretty type lap desk sitting on a chair" lol.  Plus my niece and nephew were here this weekend so I didn't get to do what I needed because I was busying running them around to get haircuts.

However some time today the desk will be in place and I will do my best to take really good after pictures.

Saturday, November 12, 2011

Updates

I'll have a good update tomorrow.  My desk will finally be done, and a mini lap desk that will be up for sell is done as well.  I'm still unsure how I feel about the top of my desk but the paint is lovely.  I have to poly it and put on the new nobs and it will finally be all done.  After that the only chore will be cleaning off my current desk and dismantling for the trash then hauling the new desk up.

We got caught up in our thrift store weekend and ended up buying two pieces of furniture that we really didn't expect to buy.  However this gives me a chance to do up our old hutch and sell it and do the "new smaller and much more apartment size hutch" up.  Also bought a secretary desk that I plan on redoing for resell.  So big things in the works, stay tuned and have a great weekend.

Sarah

P.S. Does anyone have any advice for me as far as Etsy vs Ebay goes?  I've been a seller on Ebay for years however that's usually video games/consoles or random items.  I'm wanting to sell my "twice loved" items as I call them.  Right now it would start out small just so I can see if anything sells.  I'm just not sure how a more personal item such as a refabed desk or self made items would sell on Ebay.

Friday, November 4, 2011

Procrastination...My Friend

Today has been a serious procrastination day.  Okay admittedly I got to do some thrifting and helped mom buy a cool old recliner.  By help her buy I mean Will & I picked it up at the Flea Market and carried it up the flight of stairs.  Ooh was my back killing me after that, it was sore to begin with but now it kills just to stand up straight.

Didn't find a whole bunch of goodies at the thrift store but just enough to add to the pile of "stuff".  The good news is that everything we bought is coming in as is, I do not have to re-do any of it.  After much procrastinating I finally took my butt downstairs and sanded the first layer of shiny paint off the old desk I bought to replace my oh so lovely particle board desk that I've had for 8yrs now.  I'm really excited to see how it turns out.  I'm a bit twisted on the paint color though, I'm not sure if I want it the same light gray as the nite stand I redid a couple days ago, or if I want it slightly darker.  The room itself is an aqua blue with one gray stone colored accent wall.  All the frames on the wall are either white or black.  Then I have GISLEV rug that we got from Ikea down.
I really like the shade of gray, it's not as dark as our wall and not nearly as light as the nite stand.  So I keep thinking would the desk look better in a similar shade as the rug?  As you can see I am seriously conflicted, I would like it all to match but at the same time I don't want it to be to matchy matchy since none of the pieces in our room are in the same style. I suppose in the end I will decide right before I start to actually paint, that's how I usually work anyways.

Hope you all have a lovely weekend and thank you to all of the lovely ladies who left me comments on my hutch redo.

Wednesday, November 2, 2011

Nite and Day

In one of my recent romps to a local thrift store I found this vintage side table that I felt would make a great nite stand for our room.  While redoing the kitchen I have slowly started to also weed out the old in our bedroom and try to make it a bit more "grown up".  The room is painted in blues with one gray accent wall.

Here is where the side table turned nite stand started:
Please forgive the junky looking room.  That is quite literally my junk room, it's where all my projects to be done sit until I am ready to work on them. I believe I paid $7.99 for the table, short of some chewing on the back left leg it was in great condition.  With a bit of sanding and some paint that Will mixed for me I think she turned out great.

After:

I sprayed the hardware black then distressed it a bit.  I'm not big on to much distressing, at least not in our bedroom.  I leave that to the rest of the house lol.  This was my first time using polyurethane (Minwax), I'm not sure if I did it right or not. However I knew I would need something on it to protect the paint.  Regardless I love how she turned out,  Will did a great job mixing the colors.  He used Antique White (color place) with just a dab of Stone Ebony Black (Better Homes) and it made the most perfect gray.  I have a desk and a dresser to repaint and I think for one of them I will be making some DIY chalk paint.

Linking up to:


Photobucket